Directory
1 Intro
When we talk about the expansion and update of the framework, we mainly discuss:
- How to expand framework core services to multiple machines
- How to add a node server
- How to update tarsweb
- How to update the core services of the framework to the latest version
2 Framework service expansion
The expansion of framework services will vary with the deployment mode:
2.1 Auto script deployment
Use the linux-install.sh installation framework. If you need to expand a machine, you can re execute linux-install.sh on the new machine
Note: do not set REBUILD to true, the database will be reset!!!
2.2 Docker deployment
The framework installed in the form of docker can be operated through the overall update of docker. Just upgrade docker and restart it.
Note: do not set REBUILD to true, the database will be reset!!!
It is recommended to use docker deployment mode in the formal environment. The future version upgrade of the framework is more simple and convenient!
3 Tarsnode update and update
After the successful installation of core infrastructure services, if you need to be able to deploy services based on the tars framework on other machines, you need to install tarsnode on other node machines and connect to the framework before expanding and deploying services through the management platform.
If the service is only deployed on a machine for testing, this step can be ignored first, and then executed when the capacity needs to be expanded.
The specific steps are very similar to the previous section, as follows:
Create the deployment directory of the basic service as follows:
cd /usr/local/app
mkdir tars
chown ${user}:${user} ./tars/
In main node machine, copy /usr/local/app/tars/tarsnode to new node machine: /usr/local/app/tars/
Modify /usr/local/app/tars/tarsnode/conf/tars.tarsnode.config.conf
Replace the local IP with your own local IP
At the same time, change the IP of registry into the IP of tars framework (it can be multiple), for example:
locator=tars.tarsregistry.QueryObj@tcp -h xxx2 -p 17890:tcp -h xxx2 -p 17890
start tarsnode:
/usr/local/app/tars/tarsnode/util/start.sh
Configure a process monitoring in crontab to ensure that the tars framework service can be restarted after an exception occurs.
* * * * * /usr/local/app/tars/tarsnode/util/monitor.sh
Note: if the server of the previously installed framework is monitored with check.sh, there is no need to configure the monitoring of tarsnode
4 Tars-web Update
Note that it is not recommended to update the tars web alone. Tarsweb may depend on the version of other components!!!
Update Step
- Download the latest tars web code, overwrite: /usr/local/app/web
- Modify web config: web/config/webConf.js, web/config/tars.conf, Modify the IP of DB to the current MySQL IP, and the IP of tar to the current environment registry IP
- Modify demo config : web/demo/config/webConf.js, Modify DB IP to MySQL IP of current environment
-
Modify web config: web/config/webConf.js, modify host to local machine ip
- cd web; npm install; cd demo; npm install
- restart module: pm2 restart tars-node-web; pm2 restart tars-user-system
5 Framework basic service update
Note that it is not recommended to update each component independently, because each component has a version relationship that depends on each other, and the related configuration needs to be updated for the corresponding template configuration!!!
There are two types of framework service installation:
One is core infrastructure services, which must be deployed manually,
Manually deployed core infrastructure services: tarsAdminRegistry, tarsregistry, tarsnode, tarsconfig, tarspatch

The installation package can be manually released (but cannot be released through the management platform)

make tarsAdminRegistry-tar
make tarsregistry-tar
make tarsconfig-tar
make tarspatch-tar
The update of the above package, such as uploading to the corresponding service, after decompression, overwrites the executable program under bin directory, such as updating tarsregistry:
tar xzf tarsregistry.tgz
cp -rf tarsregistry/bin/tarsregistry /usr/local/app/tars/tarsregistry/bin/tarsregistry
/usr/local/app/tars/tarsregistry/bin/util/start.sh
One is common basic service, which can be published through the management platform (just like common service).
Common basic services deployed through the management platform::tarsstat, tarsproperty,tarsnotify, tarslog,tarsquerystat,tarsqueryproperty

After the package is manually released, it is released through the management platform:

make tarsstat-tar
make tarsnotify-tar
make tarsproperty-tar
make tarslog-tar
make tarsquerystat-tar
make tarsqueryproperty-tar
Note that when deploying the management platform, you can select the correct service template (it is available by default. If there is no corresponding template, you can create it on the management platform. For specific service template content, please refer to the file under the source directory deploy/sql/template)
After executing the make statement above, / usr / local / APP / tarsframework / build will generate several *. Tgz files, such as tarslog.tgz, tarsnotify.tgz, etc., which are the package files to be deployed in the following chapters.
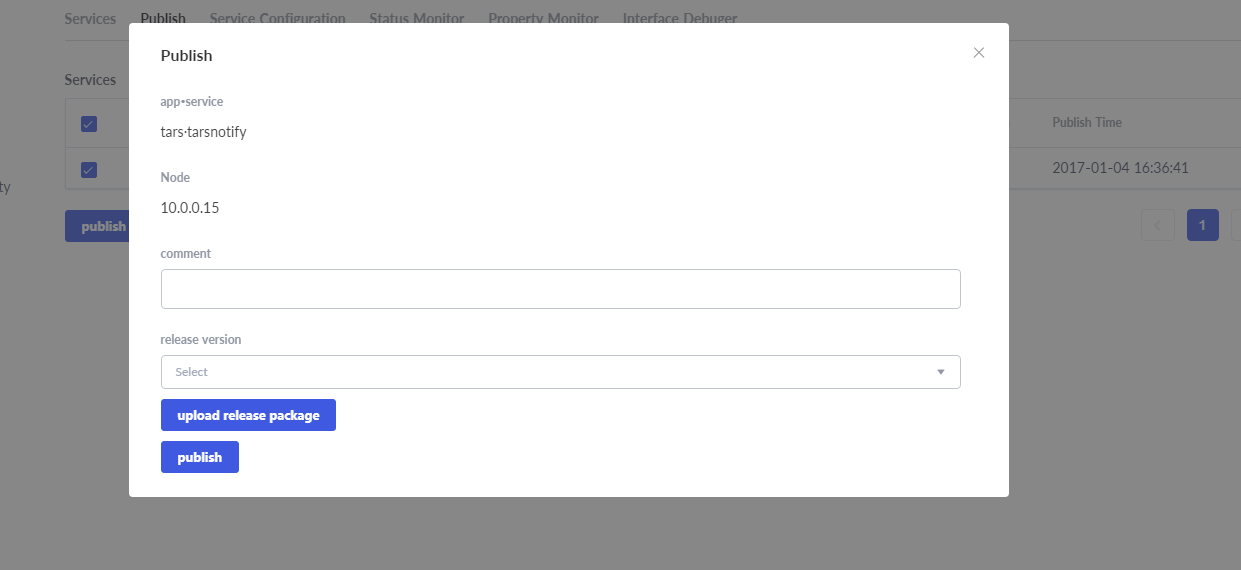
5.1 Deploy and patch tarsnotify
By default, tarsnofity is ready when install core basic service:

Upload patch package:
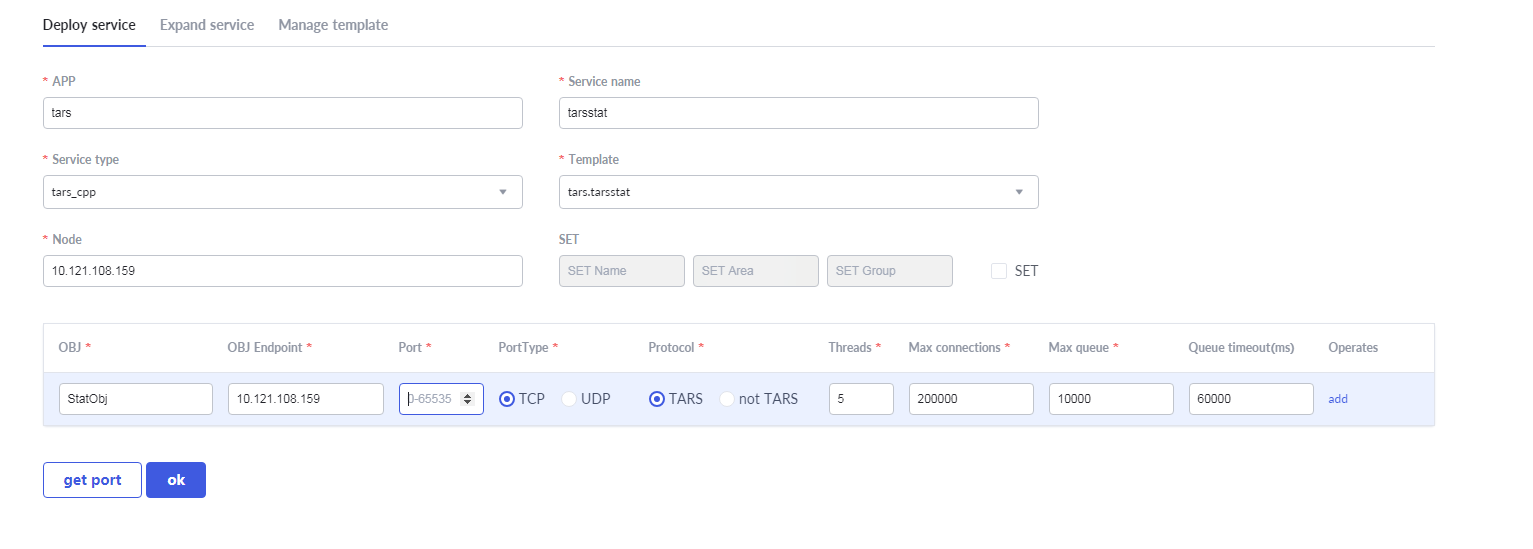
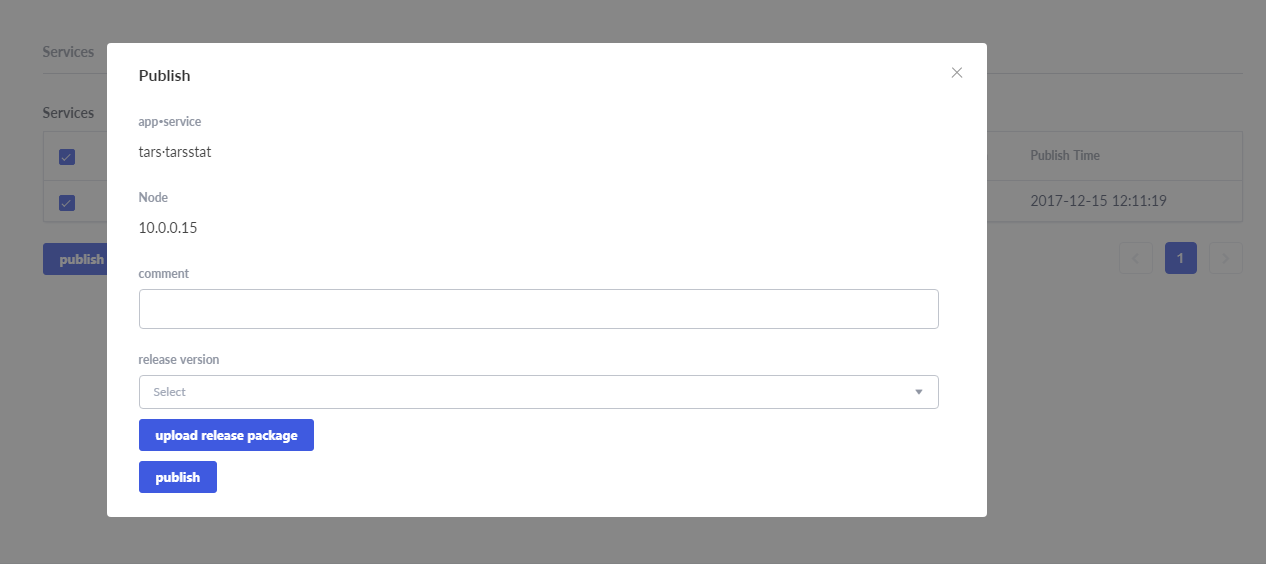
5.2 Deploy and patch tarsstat
Deploy message:
Upload patch package:
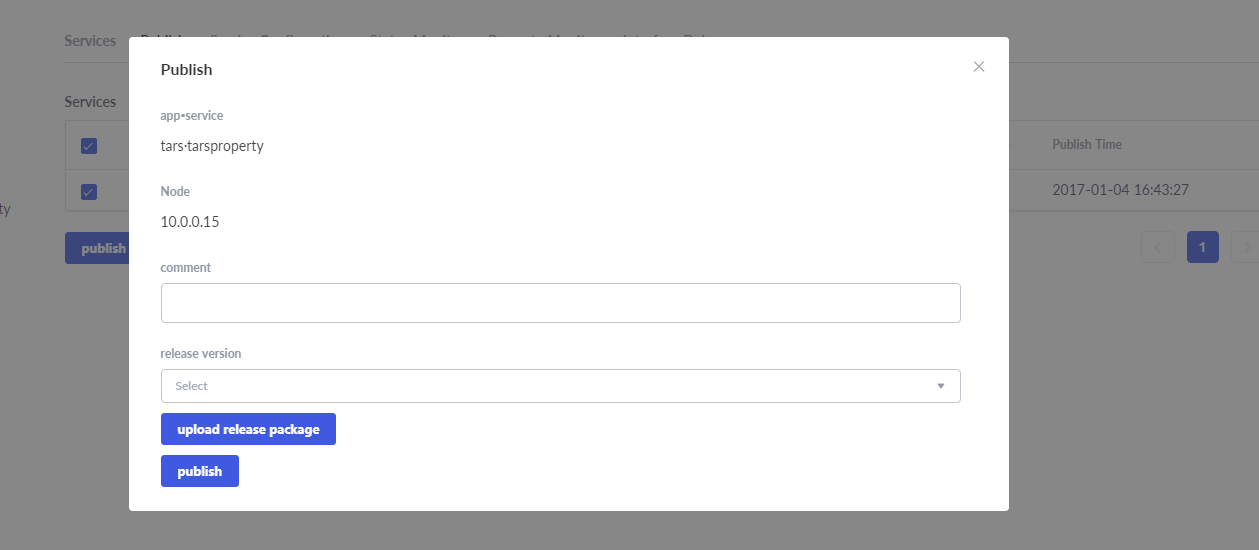
5.3 Deploy and patch tarsproperty
Deployment message:
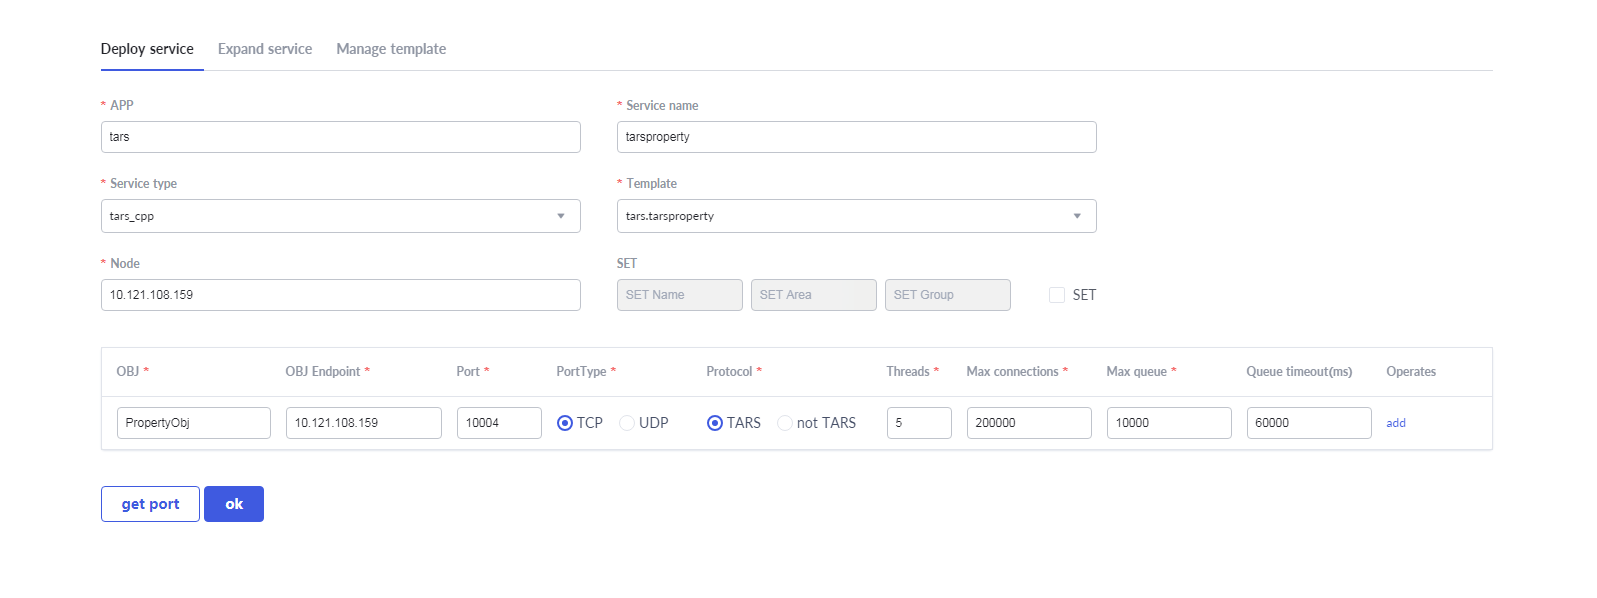
Upload patch package:
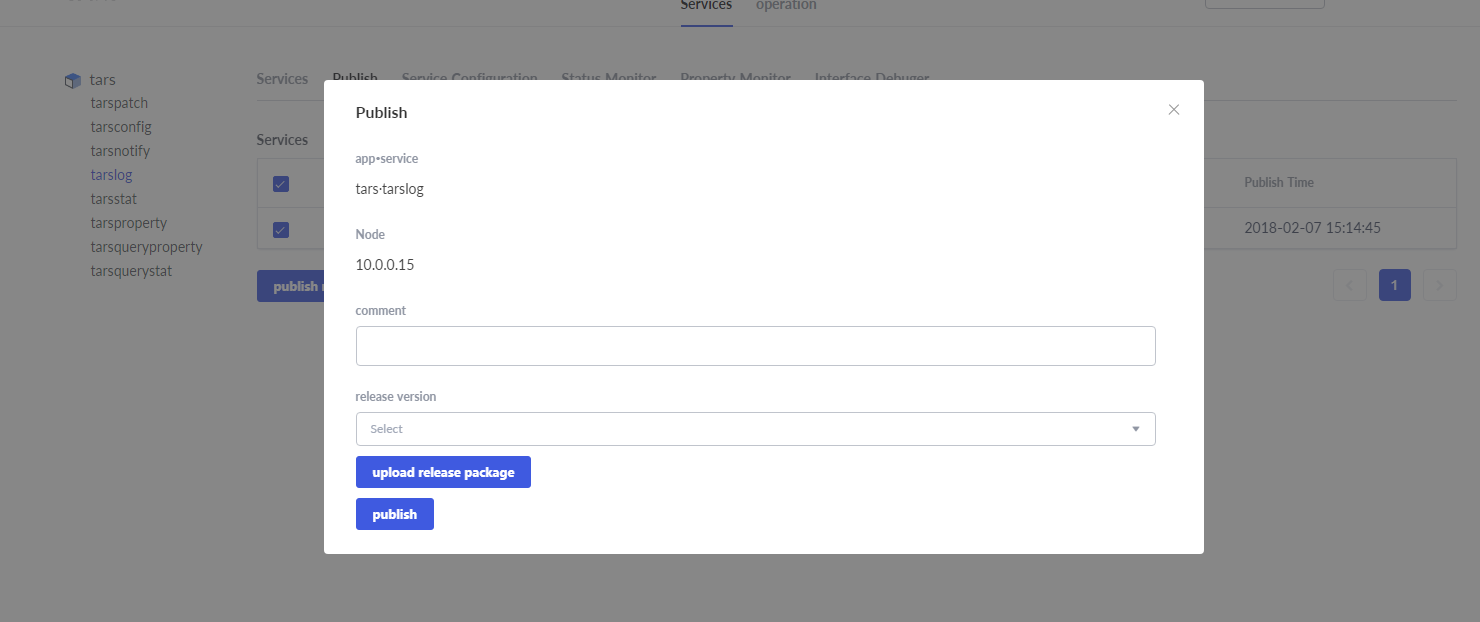
5.4 Deploy and patch tarslog
Deployment message:
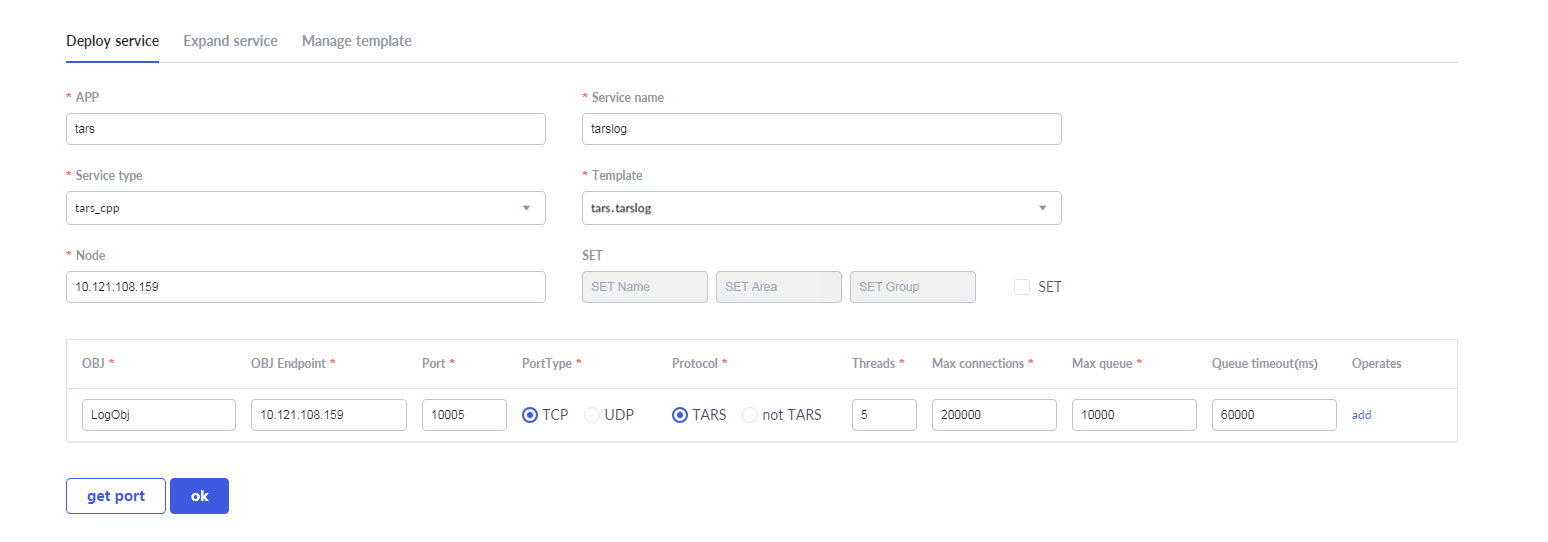
Upload patch package:
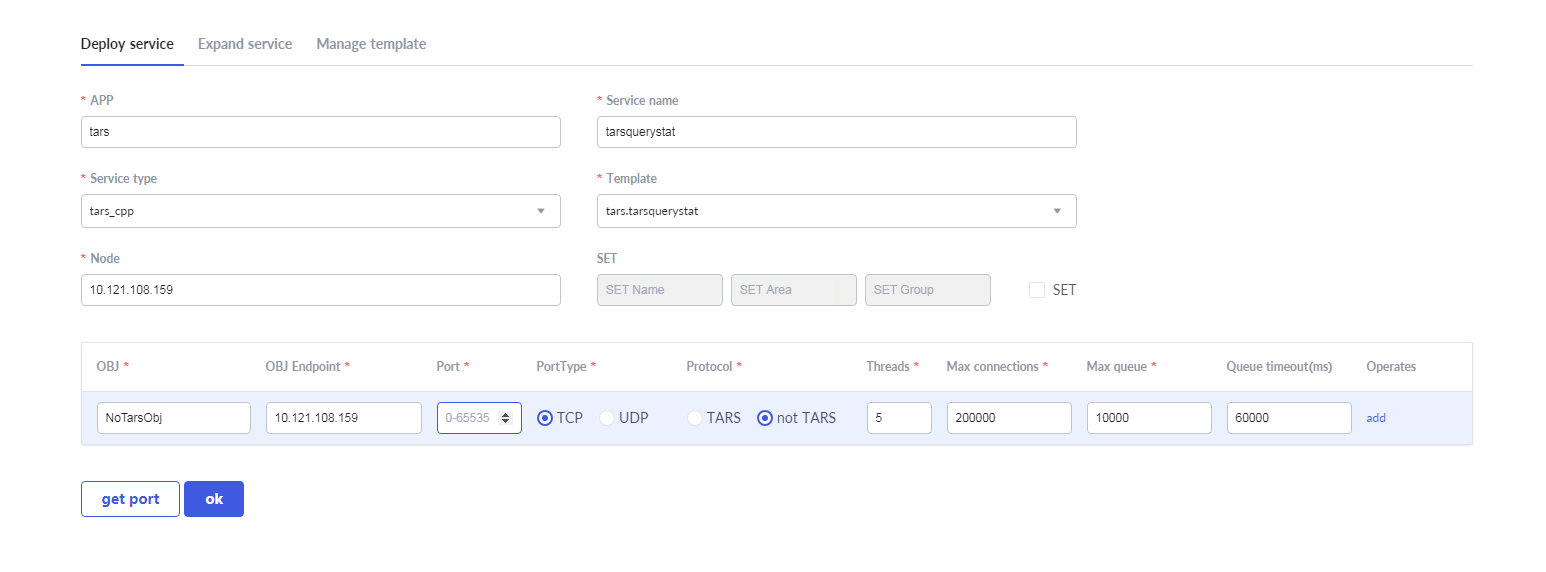
5.5 Deploy and patch tarsquerystat
Deployment message:
Pay attention: please select non-Tars protocol, because web platform use json protocol to get service monitor info.
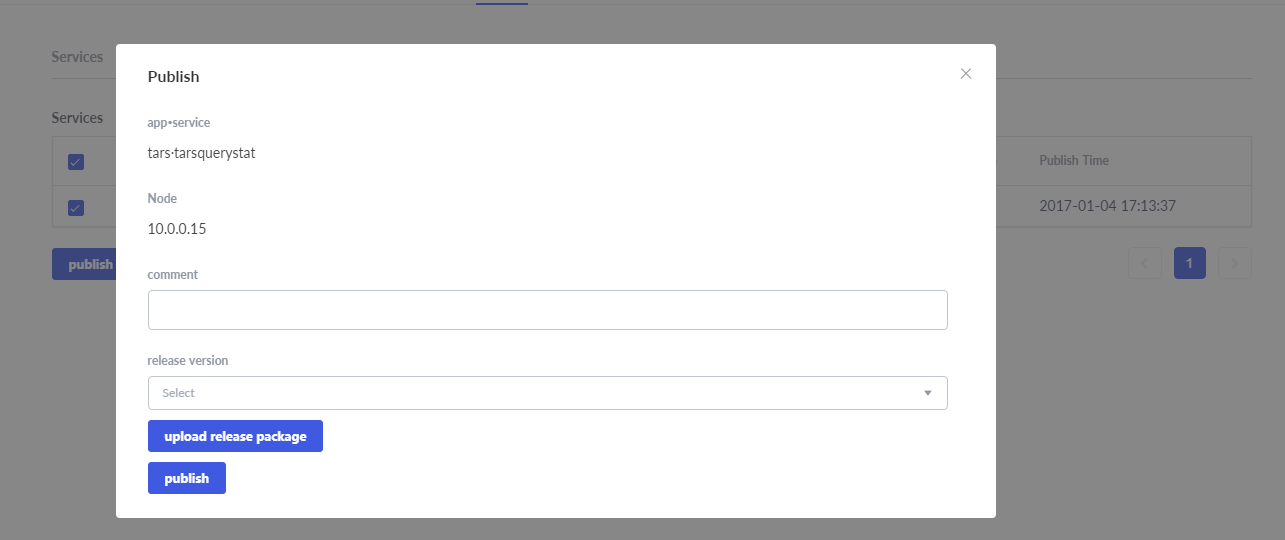
Upload patch package:
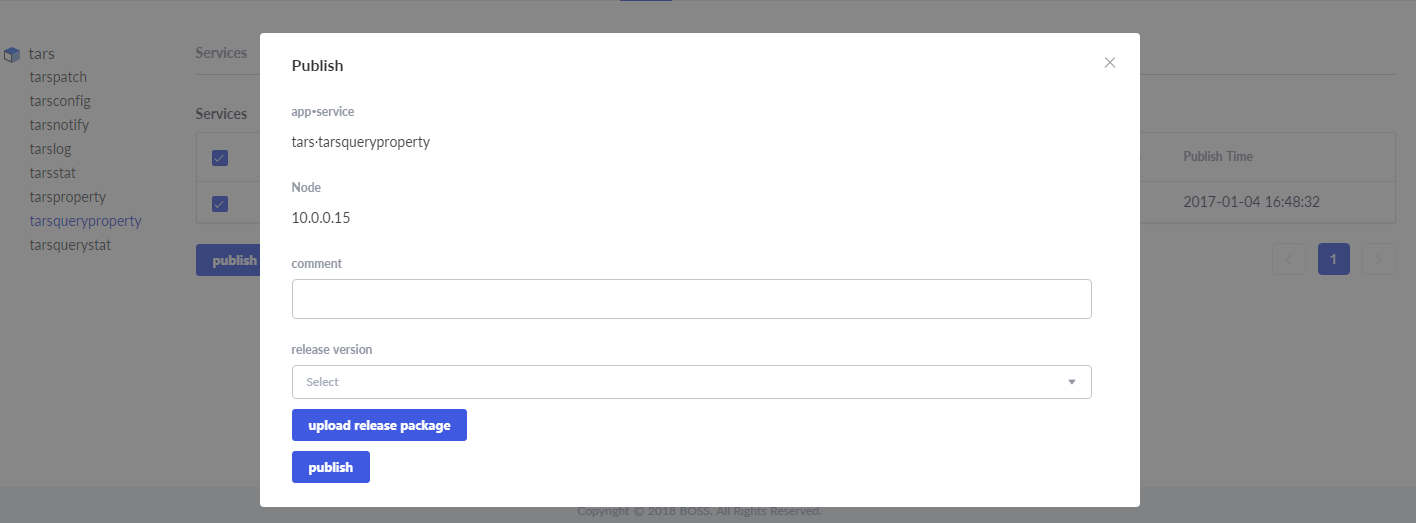
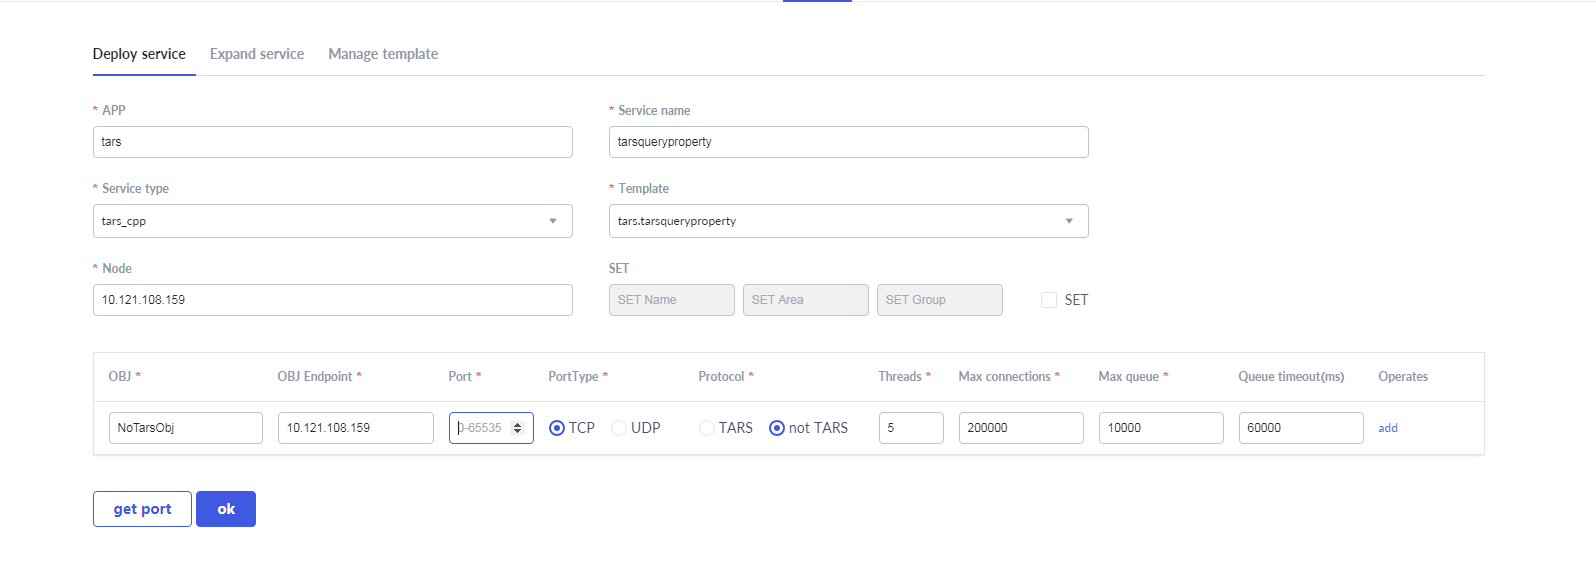
5.6 Deploy and patch tarsqueryproperty
Deployment message:
Pay attention: please select non-Tars protocol, because web platform use json protocol to get service monitor info.
Upload patch package: